
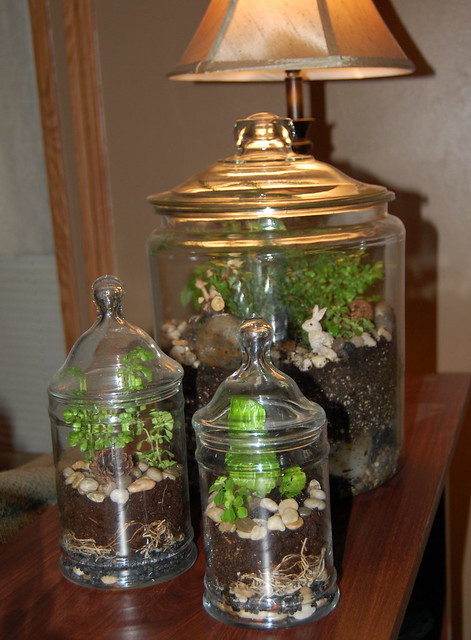
In between homework and writing projects yesterday, I replanted my huge terrarium and created a couple new smaller ones. I love how they turned out and it adds some beautiful color to the living room.
This post is a bit different than my normal ramblings. It's sort of a How-To-Make-Terrariums type of post. There are lots and lots of links in this post - click through and check out all the resources and ideas. We all need new hobbies in this journey to better health and gardening is a fun one to add to your list. So it's time to get dirty folks!
About two years ago I originally planted this big two gallon terrarium when I taught a class for a women's craft day at my mom's church. But terrariums only last so long before they need to be re-potted and it was time for new life in this one. It started out looking pretty sad...
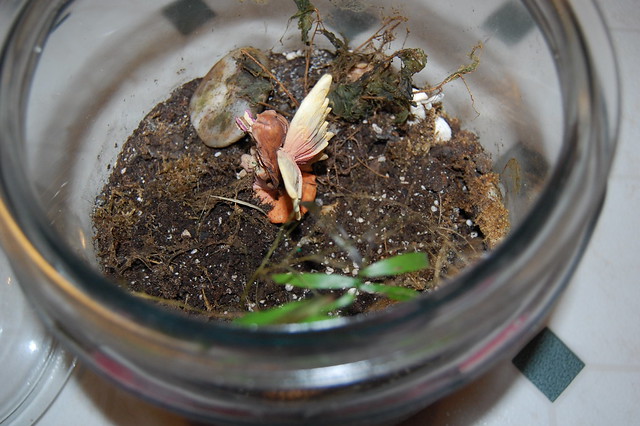
I pulled out all the old dead plants from the jar, fluffed and refreshed the soil and washed the inside of the glass and prepped the two new glass jars. I could have emptied the entire jar and started over from scratch, but I was short on potting soil, so I was trying to reuse as much as I could.
When choosing a jar, be sure it is all glass and has a tight fitting lid. The lid/top should also be glass. You don't want to use colored glass or a jar with an opaque lid -- light is very important and you want the sun to shine through on all side. You can buy specially made containers for terrarium planting - this one is cool & so is this one
 - or you can go the more scavenger route and shop at thrift stores!
The two smaller jars I bought at Goodwill for less than $1. The larger jar I bought at Walmart for about $15 (it's a cookie jar!) - mine is 2 gallon , but it also comes in 1 gallon
 which would be fun to do gardens in both sizes and cluster them together with smaller ones.
- Pea gravel
- to give water a place to drain to (aquarium gravel
would work too)
- Charcoal
(also called Activated Carbon) - to absorb odors (use the small stuff size for aquariums, not the larger pieces for plants)
- Spanish moss
- this keeps the soil separated from the drainage system below (just use a little bit)
- Potting soil
- use one designed for good drainage and has some sand added if possible
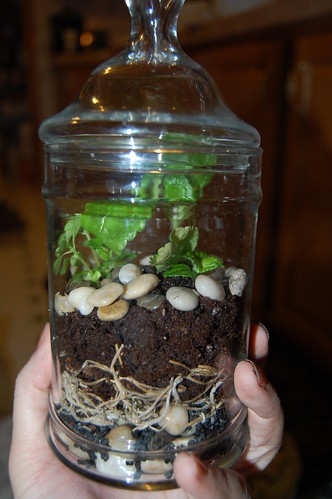
Once you layer your base products in the bottom of the jar it should take up about 1/3 of the jar space. Now it's time to plant your terrarium!
Choose plants that like a moist environment and direct or indirect sunlight. You can buy tiny plants designed specifically for terrariums and the variety is dizzying and exciting! (Even whole businesses devoted to only miniature plants!) I've never purchased any of these plants online (although I'm often tempted!) - I've been lucky to find what I needed locally. In the midwest I've been told that you have a better chance of finding small house plants in the winter or early spring months because once summer comes around they grow very quickly and soon become too big for terrariums.
You can divide larger plants from the roots and quickly plant several terrariums at the same time from a single potted plant. Choose a variety of plants with various leaf colors, shapes, textures and heights. If you choose a jar with a small opening you might need to use a tool to help with the planting process -- a spoon works great as a shovel and a fork can become a rake.
Watering and maintaining your terrarium is super easy. When you have a closed jar it becomes it's own ecosystem and the moisture inside will keep your plants watered for a month or two. Start with about 1/4c of water for a large jar or less for smaller jars then put the lid on. In the first few days, watch it closely. If your jar gets too much condensation inside the jar, take the lid off for a day or two. If the jar gets no condensation at all, it needs more water. Once you have the right balance, you should only need to water every month or two.
Once your plants are in place, add small pebbled and larger decorative rocks to add a landscape effect. You can also include figurines (don't you just love my bunny!) or twigs, pine cones and even miniature fairy houses to the forest floor. I love adding moss on top of the potting soil -- and the best place to find moss is around your house or a local park or wooded area.
In fact - my favorite kind of terrariums are 100% moss! Just skip the plants completely and gather as many different kinds of moss you can find and plant it all together. I have a small one in my kitchen window that is still growing strong after two years and I love it! In fact, check out these awesome moss terrariums from "Twig Terrariums" - I love that they have little families living inside!
If you want to learn more about building your own terrarium, I highly recommend reading about them online or buying a book or two. Here are some resources:
Choose plants that like a moist environment and direct or indirect sunlight. You can buy tiny plants designed specifically for terrariums and the variety is dizzying and exciting! (Even whole businesses devoted to only miniature plants!) I've never purchased any of these plants online (although I'm often tempted!) - I've been lucky to find what I needed locally. In the midwest I've been told that you have a better chance of finding small house plants in the winter or early spring months because once summer comes around they grow very quickly and soon become too big for terrariums.
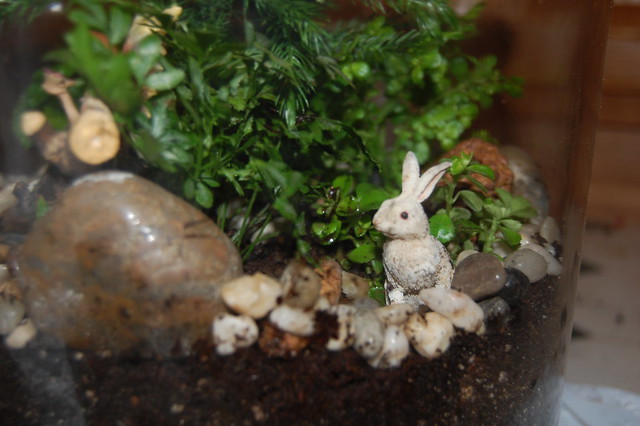 |
| Little Bunny Foo Foo lives inside my terrarium |
 |
| Terrarium by Doodle Bird |
Watering and maintaining your terrarium is super easy. When you have a closed jar it becomes it's own ecosystem and the moisture inside will keep your plants watered for a month or two. Start with about 1/4c of water for a large jar or less for smaller jars then put the lid on. In the first few days, watch it closely. If your jar gets too much condensation inside the jar, take the lid off for a day or two. If the jar gets no condensation at all, it needs more water. Once you have the right balance, you should only need to water every month or two.
Once your plants are in place, add small pebbled and larger decorative rocks to add a landscape effect. You can also include figurines (don't you just love my bunny!) or twigs, pine cones and even miniature fairy houses to the forest floor. I love adding moss on top of the potting soil -- and the best place to find moss is around your house or a local park or wooded area.
In fact - my favorite kind of terrariums are 100% moss! Just skip the plants completely and gather as many different kinds of moss you can find and plant it all together. I have a small one in my kitchen window that is still growing strong after two years and I love it! In fact, check out these awesome moss terrariums from "Twig Terrariums" - I love that they have little families living inside!
 |
| Very cool terrariums and "small worlds" from Twig Terrariums |
- University of Missouri Extension - Terrarium Guide
- The Garden Helper - How to create a terrarium garden & info about specific plants to choose
- Tabletop Gardens
- a book by Rosemary McCreary
- The New Terrarium
- a book by Martin & Clineff
Have you ever planted a terrarium before? If you decide to make one of your own - send pictures along, I'd love to see what you create!
Have fun gardening!
~Pam
How cool! I'll have to check into making some! It'd be a fun craft to do with the kids as well! Thanks for all the info.
ReplyDelete